
Sunrise over the sea pattern
Big, calm shapes that make an easy first board. 20 × 20 cm board, 8 pieces.
Difficulty: 1 out of 5.
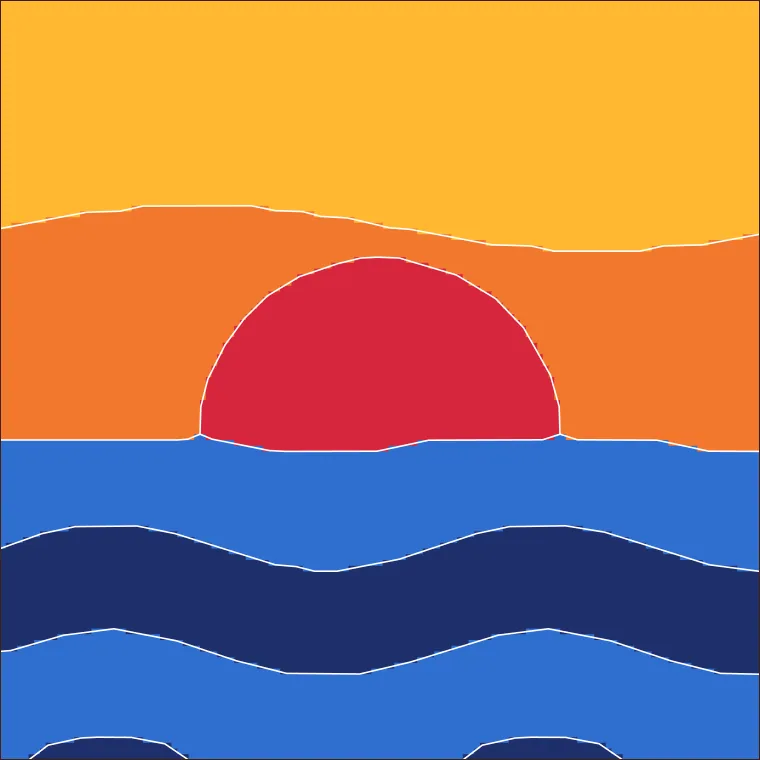
Sizes may vary with the materials you use. We suggest making a small sample first.
- Board
- 20 × 20 cm
- Pieces
- 8
- Colours
- 5
- Narrowest area
- About 6 mm
You will need
- XPS insulation foam board, 20 × 20 cm, about 2.5 cm thick
- Double-sided adhesive sheet the size of the board
- Tightly woven cotton fabric in the colours listed
- Craft knife with spare blades, fabric scissors
- Tucking tool: the back of a seam ripper or a thin nail file
- A: Yellow
- B: Blue
- C: Orange
- D: Navy
- E: Red
Before you start
- Try one small test cut on a spare piece of foam, and one tuck with your fabric, before starting.
- Use tightly woven fabric. Stretchy, thick or see-through fabric is hard to tuck.
- At corners, push the fabric into the point and not away from it. If a corner bunches up, lift it and try again.
- Change the blade as soon as it starts to tear the foam.
- Chart colours are a guide. Choose fabric by eye next to its neighbours.
Abbreviations
| Groove | The narrow cut in the foam that holds the fabric edge. |
|---|---|
| Allowance | The extra fabric left around a piece so it can be tucked in. |
| 12B | Piece 12, in Colour B. Lower numbers are larger pieces, so fill them first. |
How to make it
| 1. | Cut the foam to 20 × 20 cm. Stick on the adhesive sheet and leave its top liner in place. | |
|---|---|---|
| 2. | Print the full-size pages at 100%, tape them together and tape the sheet to the board. Keep the numbered map beside you. | |
| 3. | Cut along every line, through the paper and adhesive and about 6 mm into the foam. Keep the blade upright and use a sharp tip. | |
| 4. | Start with piece 1. Peel off its paper and liner, then use the paper as a guide to cut fabric 1 cm larger on every side. | |
| 5. | Press the fabric on the sticky area. Trim the edge to about 3 mm, then push it into the groove with light strokes, working on opposite sides in turn. | |
| 6. | Carry on in number order. Pieces at the outer edge need about 2.5 cm of extra fabric so it can wrap around the side of the board. | |
| 7. | Fold the outer fabric around the sides and fix it with adhesive or pins. A frame hides about 6 mm around the edge. |
Pieces by colour
| A | Yellow: 1 | |
|---|---|---|
| B | Blue: 4, 5 | |
| C | Orange: 2 | |
| D | Navy: 3, 7, 8 | |
| E | Red: 6 |