Long-eared bunny pattern
Tall ears, small tail and room for stripes. Amigurumi, about 15 cm tall sitting.
Difficulty: 4 out of 5. Hard: takes a long time, several techniques, parts to join.
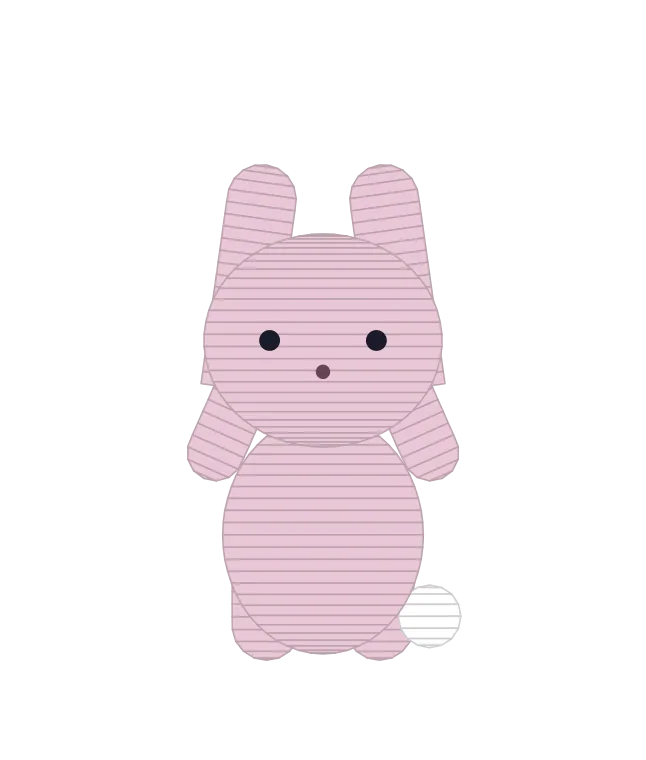
Sizes may vary with the materials you use. We suggest making a small sample first.
- Height
- 15 cm
- Gauge
- 21 stitches and 23 rows in 10 cm
- Stitches
- 3084
You will need
- Worsted (4) yarn in the colours listed
- 3.5 mm crochet hook, or the size that matches your swatch
- Polyester fibre stuffing, yarn needle, stitch marker
- Pins, to try out where things go
- A: Light grey
- B: Cream
- C: Dark brown
- D: White
Before you start
- Make a small test piece first. If it comes out larger than the gauge, try a smaller hook. If it comes out smaller, try a larger hook.
- A number in brackets at the end of a line, such as (24), is how many stitches you should have. Count them before moving on.
- Made a mistake? Pull the yarn gently to undo the stitches back to the mistake, then carry on from there.
- Toys are worked in a spiral, so rounds are not joined. Put a stitch marker in the first stitch of the round. When you come back to the marked stitch, the round is done: take the marker out, work that stitch, and put the marker in the stitch you just made. That is the first stitch of the new round.
- Keep your stitches tight so the stuffing does not show. A smaller hook than the yarn label suggests helps with this.
- Add stuffing a little at a time, and shape it with your fingers before closing a part.
- The head and body should be full, and the ears soft and flat. The face is embroidered before the head is stuffed.
Abbreviations
| MR | magic ring. Make a loop with the yarn tail, work the first stitches into it, then pull the tail to close the hole. |
|---|---|
| sc | single crochet. Put the hook in a stitch, wrap the yarn, pull up a loop (2 loops on hook), wrap again and pull through both. |
| inc | 2 sc in the same stitch. One stitch becomes two. |
| dec | invisible decrease: sc 2 together through front loops. Two stitches become one. |
| ch | chain. Wrap the yarn over the hook and pull it through the loop on the hook. |
Body
Colour A (Light grey). Work in a spiral from the bottom up. After round 18, start stuffing, keeping the bottom round and slightly wide and the top narrower. Check the stuffing after round 20, as too much makes the body hard. After round 21, cut the yarn leaving about 25 cm, take it through the front loops of the 6 stitches, from the hole outwards, and pull to close. Hide the end inside.
| Rnd 1 | 6 sc in MR | (6) |
|---|---|---|
| Rnd 2 | inc × 6 | (12) |
| Rnd 3 | (1 sc, inc) × 6 | (18) |
| Rnd 4 | (2 sc, inc) × 6 | (24) |
| Rnd 5 | (3 sc, inc) × 6 | (30) |
| Rnd 6 | (4 sc, inc) × 6 | (36) |
| Rnd 7 | (5 sc, inc) × 6 | (42) |
| Rnds 8–14 | sc around | (42) |
| Rnd 15 | (5 sc, dec) × 6 | (36) |
| Rnd 16 | sc around | (36) |
| Rnd 17 | (4 sc, dec) × 6 | (30) |
| Rnd 18 | (3 sc, dec) × 6 | (24) |
| Rnd 19 | (2 sc, dec) × 6 | (18) |
| Rnd 20 | (1 sc, dec) × 6 | (12) |
| Rnd 21 | dec × 6 | (6) |
Head
Colour A (Light grey). Work in a spiral from the top of the head down. Stop after round 21, before stuffing, and make the face.
| Rnd 1 | 6 sc in MR | (6) |
|---|---|---|
| Rnd 2 | inc × 6 | (12) |
| Rnd 3 | (1 sc, inc) × 6 | (18) |
| Rnd 4 | (2 sc, inc) × 6 | (24) |
| Rnd 5 | (3 sc, inc) × 6 | (30) |
| Rnd 6 | (4 sc, inc) × 6 | (36) |
| Rnd 7 | (5 sc, inc) × 6 | (42) |
| Rnd 8 | (6 sc, inc) × 6 | (48) |
| Rnd 9 | (7 sc, inc) × 6 | (54) |
| Rnds 10–18 | sc around | (54) |
| Rnd 19 | (7 sc, dec) × 6 | (48) |
| Rnd 20 | (6 sc, dec) × 6 | (42) |
| Rnd 21 | (5 sc, dec) × 6 | (36) |
Choose the side that looks most even as the front. You can mark the places for the eyes and nose with scraps of yarn first.
Face
Colour C (Dark brown). Everything is embroidered. There are no plastic eyes, cheeks or whiskers. Fasten the ends inside the head.
| 1. | Eyes: centre them on rounds 14 and 15, at the same height, with about 7 stitches between their inner edges. Bring the needle out at the bottom of the eye and go in about one round above. Go through the same two points 3 or 4 times to make an upright oval. Repeat for the other eye. | |
|---|---|---|
| 2. | Nose: halfway between the eyes, around round 17, mark an area about 3 stitches wide. Make short horizontal stitches, narrowing them downwards into a small triangle with a slightly pointed tip. | |
| 3. | Mouth: from the tip of the nose, make a short upright stitch about 1 round down. From the end of it, make a short curved stitch 1 to 2 stitches to the left, going down, then the same to the right. It should look like a small upside-down Y. |
Close the head
Colour A (Light grey). Carry on from round 22. After round 23, add stuffing a little at a time. Keep the sides round and flatten the bottom slightly so it sits on the body. Check it once more after round 25. After round 26, take the yarn through the front loops of the 6 stitches, from the hole outwards, and pull to close. Leave a long tail for sewing the head on.
| Rnd 22 | (4 sc, dec) × 6 | (30) |
|---|---|---|
| Rnd 23 | (3 sc, dec) × 6 | (24) |
| Rnd 24 | (2 sc, dec) × 6 | (18) |
| Rnd 25 | (1 sc, dec) × 6 | (12) |
| Rnd 26 | dec × 6 | (6) |
Long ear × 2
Colour A (Light grey). Start at the tip of the ear. Cut the yarn leaving about 25 cm. Do not put stuffing, wire or stiffener in the ears, so they hang down softly. Flatten each ear with your fingers, then fold the open edge in half and sew the 6 stitches on each side together.
| Rnd 1 | 6 sc in MR | (6) |
|---|---|---|
| Rnd 2 | inc × 6 | (12) |
| Rnd 3 | (1 sc, inc) × 6 | (18) |
| Rnds 4–18 | sc around | (18) |
| Rnd 19 | (1 sc, dec) × 6 | (12) |
| Rnds 20–22 | sc around | (12) |
Ear lining × 2
Colour B (Cream). These pieces are flat, worked back and forth in rows and not in a spiral. Start with ch 5. At the end of each row, ch 1 and turn the work. The turning chain does not count as a stitch. Cut the yarn leaving a long tail.
| Row 1 | 4 sc, starting in the second chain from the hook | (4) |
|---|---|---|
| Row 2 | inc, 2 sc, inc | (6) |
| Row 3–13 | 6 sc | (6) |
| Row 14 | dec, 2 sc, dec | (4) |
| Row 15 | 4 sc | (4) |
Arm × 2
Colour A (Light grey). Before round 11, put a little stuffing in the lower two thirds. After round 11, close the 6 stitches through their front loops and leave a long tail.
| Rnd 1 | 6 sc in MR | (6) |
|---|---|---|
| Rnd 2 | inc × 6 | (12) |
| Rnds 3–10 | sc around | (12) |
| Rnd 11 | dec × 6 | (6) |
Leg × 2
Colour A (Light grey). Cut the yarn leaving about 25 cm and stuff each leg. The closed end is the front of the foot, and the open end is sewn to the body.
| Rnd 1 | 6 sc in MR | (6) |
|---|---|---|
| Rnd 2 | inc × 6 | (12) |
| Rnd 3 | (1 sc, inc) × 6 | (18) |
| Rnds 4–7 | sc around | (18) |
| Rnd 8 | (1 sc, dec) × 6 | (12) |
| Rnds 9–10 | sc around | (12) |
Tail
Colour D (White). Put in a little stuffing. Leave the last 12 stitches open and cut a long tail for sewing.
| Rnd 1 | 6 sc in MR | (6) |
|---|---|---|
| Rnd 2 | inc × 6 | (12) |
| Rnd 3 | (1 sc, inc) × 6 | (18) |
| Rnds 4–5 | sc around | (18) |
| Rnd 6 | (1 sc, dec) × 6 | (12) |
Assembly
| 1. | Ear linings: centre a lining on the front of each ear, leaving 1 to 2 rounds of the ear above it and stopping before the narrow base. Sew around the edge with small stitches, without stretching it. Both ears should match. | |
|---|---|---|
| 2. | Head: put the closed end of the head on the top centre of the body, with the face forward, and pin it. Using a long length of Colour A, sew around the join between round 19 of the body and round 24 of the head, spreading the stitches over 12 to 16 stitches. Go around a second time to reinforce it, and check that the head does not tip forward. | |
| 3. | Ears: set the narrow ends on the sides of the head around rounds 5 to 7, with the lining facing forward, turned slightly outwards. Pin them, check how they hang, then sew them on with a few rows of firm stitches. They should hang freely at the sides, not stand up. | |
| 4. | Arms: set them on the upper sides of the body on rounds 17 to 19, at the same height, pointing slightly out and down. Fix the closed ends with a few firm stitches. | |
| 5. | Legs: sit the body down. At the lower front, set the open ends on rounds 5 to 8, with 2 to 3 stitches between them and the closed ends facing forward. Pin them, check from the front, then sew around the open ends. | |
| 6. | Tail: on the lower back, on the centre line around rounds 8 to 10, sew around the open edge so it sticks out a little. | |
| 7. | Sit the bunny on a flat surface. Ease the ears down gently and check that the feet, arms and face are even. Hide all the ends. |
These places are only a suggestion. Set the ears higher, or let one flop forward, to give your bunny its own character. Pin everything first, look at it, then sew.
If something looks off
| • | The ears stand up: check that they have no stuffing and are not sewn too high. | |
|---|---|---|
| • | The linings pucker: the stitches are too tight. Loosen them and flatten the piece. | |
| • | The head tips forward: add supporting stitches around the join. | |
| • | The legs hang down: sew them again with the closed ends facing forward. | |
| • | The bunny feels hard: there is too much stuffing. The ears have none and the arms only a little. |